SHROUD ELECTRIC FAN RELAY 22" CORE FOR 68-74 DODGE CORONET PLYMOUTH BIG BLOCK V8
$ 52.28
Description
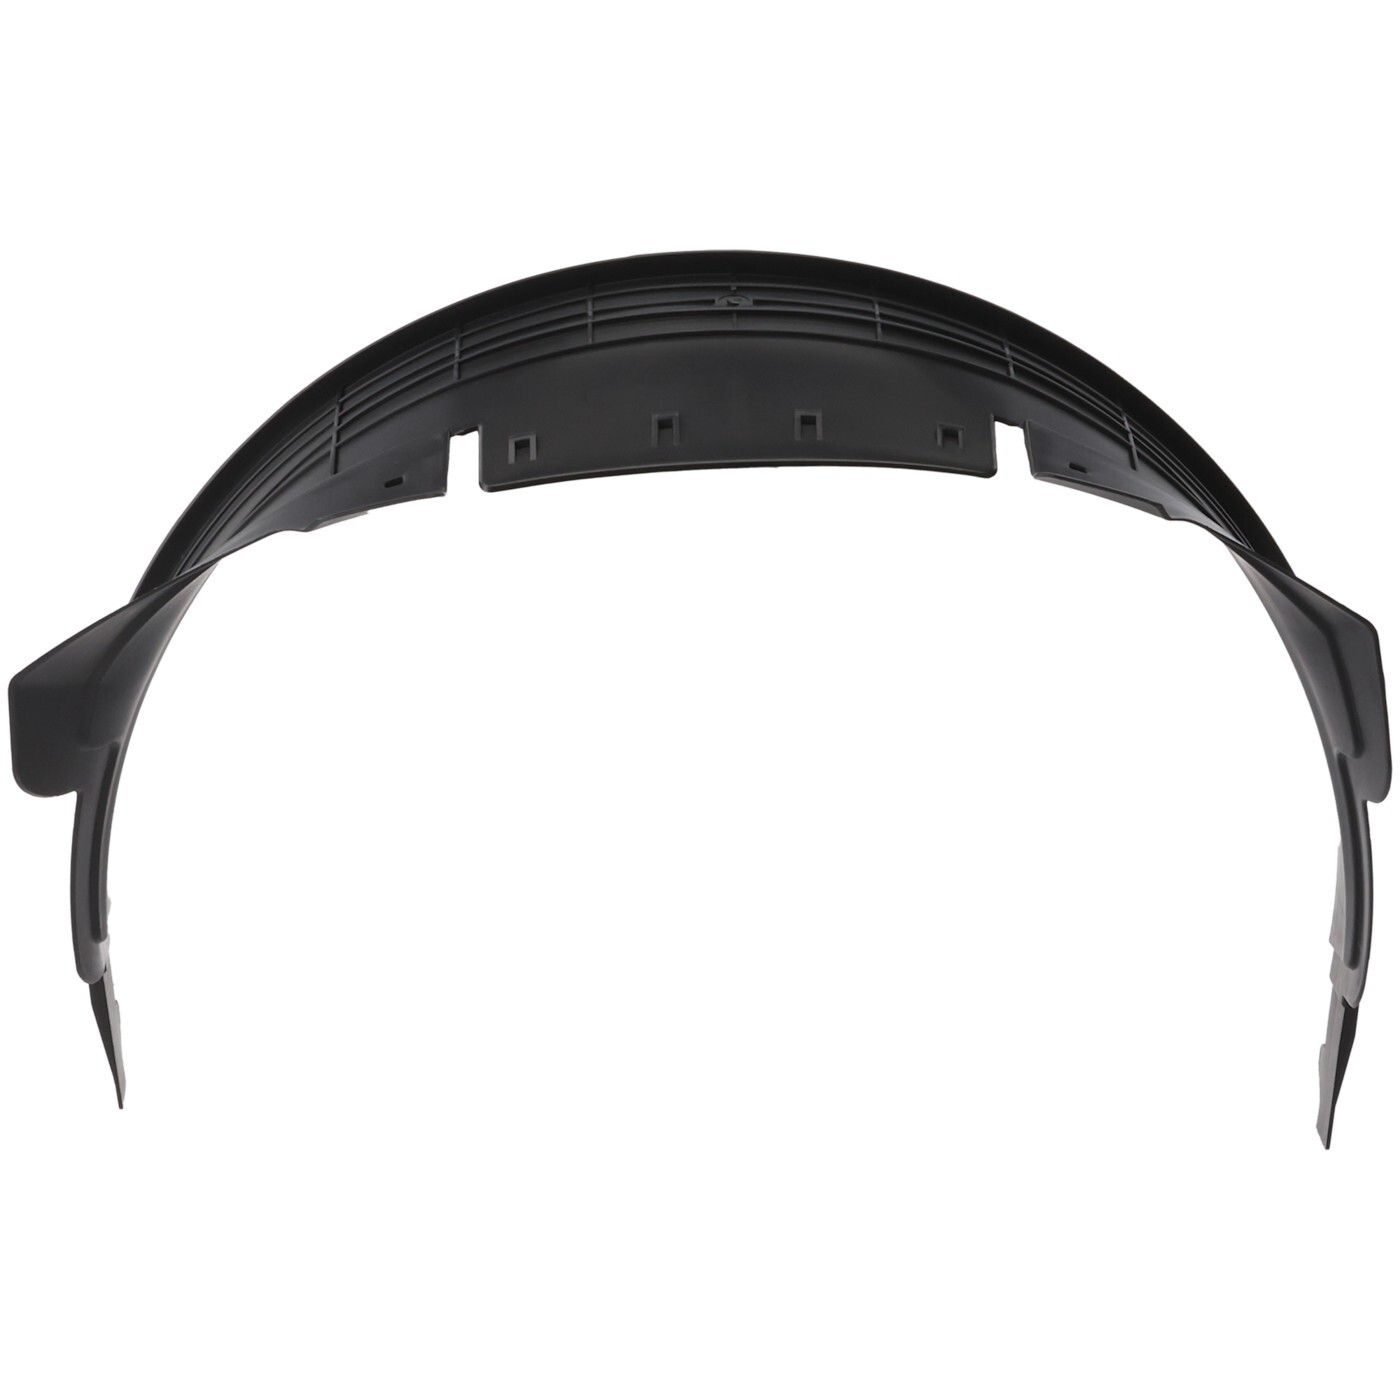
STORE HOME ALL LISTINGS ABOUT US CONTACT US ADD TO FAVS FEEDBACK STORE CATEGORIES STORE NEWSLETTER ITEM DETAILS ITEM DESCRIPTION Package included: 1 X AA5052 Aluminum Shroud 1 X 14" 90W Fan 1 X Thermostat Temperature Switch Relay Kit Vehicle Fitment: For 1970-1971 Dodge Challenger 22" Core-Big Block For 1970-1972 Dodge Charger 22" Core-Big Block For 1970-1972 Dodge Coronet 22" Core-Big Block For 1972 Plymouth Roadrunner 22" Core-Big Block For 1967-1971 Plymouth GTX 22" Core-Big Block Fan Specification: Diameter : 14'' (Blade to Blade) Voltage: DC 12 Volts Wattage: 90W Number of Blades: 8 S-Type blades Maximum Fan CFM(Cubic Feet per Minute): 2250cfm Maximum Fan RPM(Revolution(s) Per Minute): 2000±10% Fan Thickness: 2.64" S-Type Blade pull push design, to make air flow more efficient and bring more cooling Effect Powerful 90 watt motor will keep your engine cool. Thermostat Relay Kit: Universal fit for any automotive vehicle and electric fan. Activates by grounding electric fans at preset temperature. 180'F turn-on temperature, 165'F turn-off temperature. 3/8" NPT thread-in brass probe Probe typically threads into radiator, water outlet or manifold. RELAY KIT INSTRUCTIONS RED + connect directly to battery. WHITE wire to ignition switch power source. BLACK goes to thermos switch. BLUE wire goes to the Fans. AA5052 Aluminum Shroud and Fans: The New Design fan and the AA5052 fan shroud effectively drive the heat over and out the engine compartment rather than thrusting it into the front of the engine. The fan shroud basically houses the fan blades securing it in place and keeping it from damaging the other engine components that may disturb the smooth and even operation of the engine. With excellent operating temperature management, allowable levels of engine temperature are stabilized. Investing in proper maintenance though will considerably benefit the ride and driving quality in maintaining the ideal working conditions of the engine. 1. Shuttered design AA5052 fan shroud to guaranteed airflow passes high efficiently.Make your engine bay perfect! 2. S blade fans, Push or Pull Type design,lightweight Plastic Durable Material. 3. Additional with thermostat,professional matching advice, conside r for every detail and needed Description: A car engine produces heat that reaches 280F in only a few minutes. This is why a cooling system is included to maintain the engine's temperature at a tolerable level. The radiator, fan, and fan shroud are parts of that system, and the focus of this segment is on the fan shroud. It may look like a part your car can live without, but it actually provides an irreplaceable function. Read on to find why, and discover more information. What's a fan shroud and how does it work? Basically, a fan shroud surrounds the fan, that's it; but there's an even deeper explanation. Since the fan assists the radiator in cooling the engine, the radiator needs all the air it can get. The fan shroud is designed to gather the moving air from the fan to the radiator. If there's no fan shroud, the air from the fan will scatter, and the radiator will not cool the engine effectively. Are fan shrouds the same for all types of cars? Fan shrouds are mostly different for every car type. Although the difference can be minimal, you should remember that it has to equate the size of the fan, and the need of the engine. The material used also varies; it can be plastic, aluminum or steel. Another factor you should consider is the single or dual fan types. To make it easier, check your current fan shroud and see whether it has only one fan or two. The arrangement of the cooling system in your engine begins with the radiator; next is the fan and then the fan shroud. Since this guide is for the fan shroud replacement, you will first discover how to remove the radiator and then the easier portion which is the fan shroud. This step-by-step guide will show you how. Installation Steps: Step 1: Lift the front portion of the car using the floor jack. Step 2: Secure the desired height by placing the jack stands underneath the car's solid frames. Step 3: Place the oil pan underneath the radiator drain hose, and pull the hose off. Make sure it the pan catches all the coolant. Step 4: Remove the radiator hose located on top using the screwdriver or the socket wrench. Step 5: Disconnect the electric connection of the radiator fan, and remove the bolts that hold the fan. If the fan is connected to the radiator, you have to pull-out the radiator first. Step 6: Remove the bolts that hold the radiator on the top and lower portions, and pull the radiator out. You will also be able to pull-out the fan as well. Step 7: Locate the bolts on top that hold the fan shroud on top and use the socket wrench to remove it. Likewise, find the retaining clips at the bottom, snap it loose, and remove the fan shroud. Step 8: Attach the new fan shroud. Step 9: Return all the parts by doing the entire procedure starting from the previous step. Remember to refill the car's coolant before you switch the engine on. The fan shroud replacement itself takes only 10-15 minutes, but since you have to deal with the radiator and the fan, the entire process is around 1-2 hours to complete. SHIPPING PAYMENT RETURNS ABOUT US SHIPPING All orders sent within one working day after payment received. The shipping costs is for the lower 48 ststes only,other please quote. Please contact for quote if international postage NOT display. PAYMENT Please contact us to request a return, and do not ship an item back before receiving return instructions. All merchandise MUST be returned in original packaging and in resalable condition. Please keep in mind that spending time before purchasing the part to confirm it is indeed exactly what you need can help prevent you from ordering the wrong part. Customer is responsible for all shipping charges to return item. Please contact us to understand the return process as we aim for an easy & smooth process. RETURNS paypal ABOUT US We are manufacturer, not exporter. All shop order, bulk order, wholesale is welcome. We also make-to-order. Please feel free to ask. About us Contact us Store home Store Home FAQ Shipping Returns & Exchanges Privacy Policy Copyright ? 2015 coolingonline. All Rights Reserved. Package included: 1 X AA5052 Aluminum Shroud 1 X 14" 90W Fan 1 X Thermostat Temperature Switch Relay Kit Vehicle Fitment: For 1970-1971 Dodge Challenger 22" Core-Big Block For 1970-1972 Dodge Charger 22" Core-Big Block For 1970-1972 Dodge Coronet 22" Core-Big Block For 1972 Plymouth Roadrunner 22" Core-Big Block For 1967-1971 Plymouth GTX 22" Core-Big Block Fan Specification: Diameter : 14'' (Blade to Blade) Voltage: DC 12 Volts Wattage: 90W Number of Blades: 8 S-Type blades Maximum Fan CFM(Cubic Feet per Minute): 2250cfm Maximum Fan RPM(Revolution(s) Per Minute): 2000±10% Fan Thickness: 2.64" S-Type Blade pull push design, to make air flow more efficient and bring more cooling Effect Powerful 90 watt motor will keep your engine cool. Thermostat Relay Kit: Universal fit for any automotive vehicle and electric fan. Activates by grounding electric fans at preset temperature. 180'F turn-on temperature, 165'F turn-off temperature. 3/8" NPT thread-in brass probe Probe typically threads into radiator, water outlet or manifold. RELAY KIT INSTRUCTIONS RED + connect directly to battery. WHITE wire to ignition switch power source. BLACK goes to thermos switch. BLUE wire goes to the Fans. AA5052 Aluminum Shroud and Fans: The New Design fan and the AA5052 fan shroud effectively drive the heat over and out the engine compartment rather than thrusting it into the front of the engine. The fan shroud basically houses the fan blades securing it in place and keeping it from damaging the other engine components that may disturb the smooth and even operation of the engine. With excellent operating temperature management, allowable levels of engine temperature are stabilized. Investing in proper maintenance though will considerably benefit the ride and driving quality in maintaining the ideal working conditions of the engine. 1. Shuttered design AA5052 fan shroud to guaranteed airflow passes high efficiently.Make your engine bay perfect! 2. S blade fans, Push or Pull Type design,lightweight Plastic Durable Material. 3. Additional with thermostat,professional matching advice, conside r for every detail and needed Description: A car engine produces heat that reaches 280F in only a few minutes. This is why a cooling system is included to maintain the engine's temperature at a tolerable level. The radiator, fan, and fan shroud are parts of that system, and the focus of this segment is on the fan shroud. It may look like a part your car can live without, but it actually provides an irreplaceable function. Read on to find why, and discover more information. What's a fan shroud and how does it work? Basically, a fan shroud surrounds the fan, that's it; but there's an even deeper explanation. Since the fan assists the radiator in cooling the engine, the radiator needs all the air it can get. The fan shroud is designed to gather the moving air from the fan to the radiator. If there's no fan shroud, the air from the fan will scatter, and the radiator will not cool the engine effectively. Are fan shrouds the same for all types of cars? Fan shrouds are mostly different for every car type. Although the difference can be minimal, you should remember that it has to equate the size of the fan, and the need of the engine. The material used also varies; it can be plastic, aluminum or steel. Another factor you should consider is the single or dual fan types. To make it easier, check your current fan shroud and see whether it has only one fan or two. The arrangement of the cooling system in your engine begins with the radiator; next is the fan and then the fan shroud. Since this guide is for the fan shroud replacement, you will first discover how to remove the radiator and then the easier portion which is the fan shroud. This step-by-step guide will show you how. Installation Steps: Step 1: Lift the front portion of the car using the floor jack. Step 2: Secure the desired height by placing the jack stands underneath the car's solid frames. Step 3: Place the oil pan underneath the radiator drain hose, and pull the hose off. Make sure it the pan catches all the coolant. Step 4: Remove the radiator hose located on top using the screwdriver or the socket wrench. Step 5: Disconnect the electric connection of the radiator fan, and remove the bolts that hold the fan. If the fan is connected to the radiator, you have to pull-out the radiator first. Step 6: Remove the bolts that hold the radiator on the top and lower portions, and pull the radiator out. You will also be able to pull-out the fan as well. Step 7: Locate the bolts on top that hold the fan shroud on top and use the socket wrench to remove it. Likewise, find the retaining clips at the bottom, snap it loose, and remove the fan shroud. Step 8: Attach the new fan shroud. Step 9: Return all the parts by doing the entire procedure starting from the previous step. Remember to refill the car's coolant before you switch the engine on. The fan shroud replacement itself takes only 10-15 minutes, but since you have to deal with the radiator and the fan, the entire process is around 1-2 hours to complete.